Working Remotely
This page describes how to use the Xilinx FPGA development tools from your own computer, and how to configure VLAB connections when working off campus. Contents
Local Xilinx Tools Installation
Installation Notes for EMBS Students
At the time of writing, the version of the tools installed in the student hardware labs is 2025.1. Xilinx only directly support some specific distributions of Linux so you might get an error about missing libraries which can be fixed by following this link.
Installing the Xilinx software on your computer may seem the simplest solution, but they are large; around 60GB for the bare minimum set of features required for EMBS, and increasing to about triple that for a full install (which is rarely necessary and not recommended).
With that said, if you want to go down this route you can. First go to the Xilinx website, create a free account, download the appropriate installer and run it.
On Linux the file will be called something like FPGAs_AdaptiveSoCs_Unified_SDI_2025.2_1114_2157_Lin64.bin. You need to make it executable then run it:
chmod +x FPGAs_AdaptiveSoCs_Unified_SDI_2025.2_1114_2157_Lin64.bin
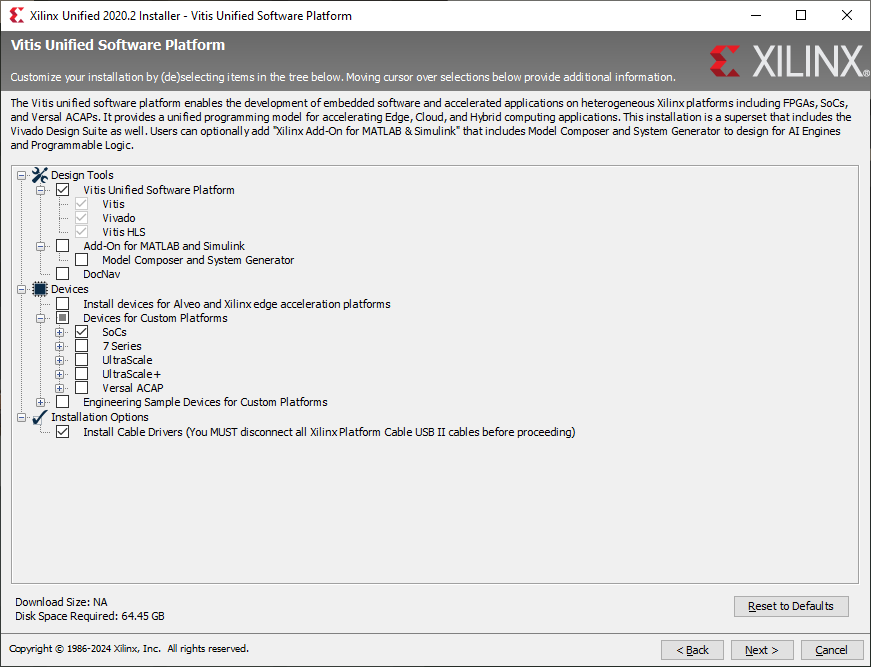
./FPGAs_AdaptiveSoCs_Unified_SDI_2025.2_1114_2157_Lin64.binFor EMBS, you need to install Vitis, Vivado, (Vitis HLS if this is a separate option), and to Install Cable Drivers. Under “Devices” turn on support for all the types of FPGAs that you will be using. For the Zybo in EMBS just turn on “SoCs”. Depending on the exact version you are installing it will look something like this:
After a long download and installation process, the tools should now be installed. They can be run from the launchers created by the installation, or from a terminal as follows:
/tools/Xilinx/Vivado/<Version Number>/Vivado/bin/vivadoLicensing
The Zybo Z7-10 board uses a Zynq-7000 XC7Z010 device, which is supported by the free Vivado ML Standard Edition. You do not need to purchase a licence or obtain a voucher code. However you will need to go get a licence file from AMD/Xilinx. Instructions for doing this are detailed here.
Using the Zybo Z7 (EMBS) boards
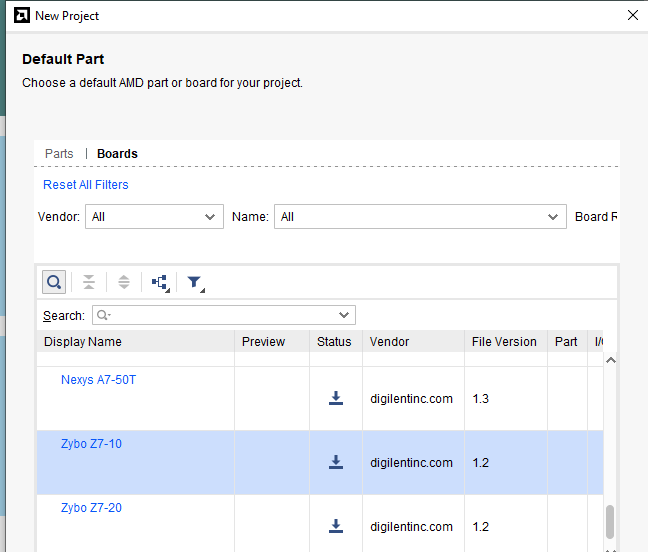
If you are using a Zybo board (e.g. for EMBS) you will also need to install the Digilent board definition files. To do this, in the New Project wizard you will get to the “Default Part” page. Select Boards, and Refresh, to download the catalogue of boards from Xilinx. Find the Zybo Z7-10 board and click the install button (the downwards arrow in the Status column).
Alternatively you can download the archive of the vivado-boards Github repository and extract it. After installing Vivado, open the extracted archive and copy the ‘new/board_files/zybo-z7-10’ folder into:
/tools/Xilinx/Vivado/<Vivado Version Number>/data/boards/board_files
(Assuming you installed the tools to /tools/Xilinx. This same process works for the Windows version, but to wherever Windows installs the tools instead.)
Connecting through the SSH Gateway
If you are trying to access the VLAB from your home machine, you need to set up SSH access through the IT Services SSH gateway. Do the following:
Linux / macOS
Create an SSH key pair on your local machine with ssh-keygen.
ssh-keygenIt will ask where to save the keys, accept the defaults. Add the following to your SSH config file (~/.ssh/config). If you don’t already have such a file, create it.
~/.ssh/config
Host ssh.york.ac.uk
User YOUR_USERNAME

Host rts001.cs.york.ac.uk csteach0.york.ac.uk
User YOUR_USERNAME
ProxyCommand ssh -A -T -o Compression=no ssh.york.ac.uk -W %h:%p
Once this is done you can type:
ssh-copy-id csteach0.york.ac.ukto copy your key to the SSH Gateway. (If you are research staff, use csresearch1.york.ac.uk). You will have to enter your password multiple times. You should now be able to just connect using SSH:
ssh -Y csteach0.york.ac.ukYou can use this to run the Xilinx applications on the CS servers. On Linux this will just work, but on other operating systems you will need to install an X server to be able to see the GUI of the tools (such as XQuartz for macOS, or Xming for Windows). Install and run the X server and now if you run things they will magically appear on your own desktop as if you were running them locally (albeit slowly).
Windows 11
We recommend using the Ubuntu distribution for the Windows Subsystem for Linux although other Linux distros should work fine as well. Once installed, run the Ubuntu “app” and then follow the Linux instructions above.
Running the VLAB
Now that you have the tools running remotely, you will need to use the VLAB to connect to an FPGA and work with it. The VLAB Quickstart Guide is here.